The Non-Destructive Bevel tool offers a few settings to customize the Non-Destructive Bevel behaviour and display.
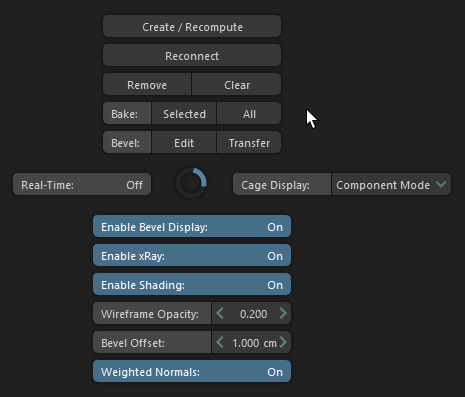
All the settings are accessible from the tool Window and most are also available in the Pie Menu.
Pie Menu #
The Pie Menu offers a quick way to access and modify the Non-Destructive Bevel settings and functions.
To open the Pie Menu, you can either set up a hotkey on the NDB_Toggle_Pie_Menu function inside the hotkey editor.
Or you can set the Show Manips override to On from the tool Window, which allows you to toggle between the Pie Menu and the Show Manipulator Tool by using the Show Manipulators hotkey (T by default).
Dynamic Bevel Node #
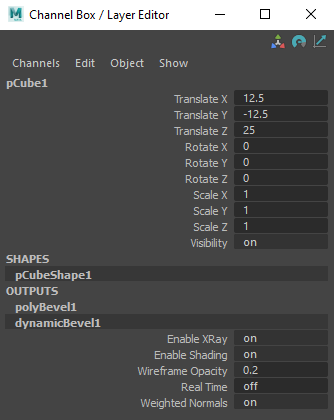
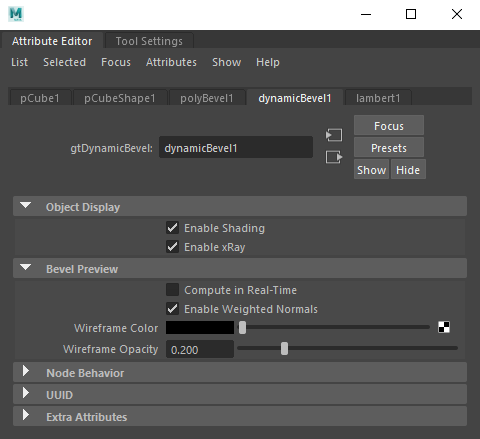
The Non-Destructive Bevel settings are also accessible from their respective nodes. For example, you can access many display options from the dynamicBevel node either from the Channel Box or from the Attribute Editor.
Bevel Preview Node #
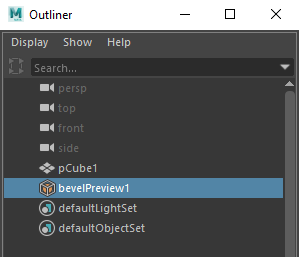
When you add a Non-Destructive Bevel on an object, a new shape named bevelPreview# is created which is going to output the beveled version of the original object. These shapes are not editable before they are baked, their sole purpose is to display the beveled object results in the viewport.
You can manually delete a bevelPreview node if you no longer want the Non-Destructive Bevel to affect an object.
Hidden In Outliner #
If you find that the bevelPreview shapes are cluttering your Outliner, you can hide them by checking the Hidden In Outliner checkbox in the Non-Destructive Bevel Window, from the Edit menu bar.
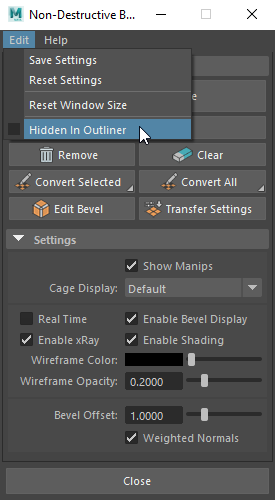
Show Manips #
The Show Manips override offers a convenient way to toggle On / Off the Non-Destructive Bevel Pie Menu.
When the Show Manips override is turned On, you will be able to open the Pie Menu by pressing your Show Manipulators hotkey (T by default).
If you select a node that is editable through the Maya In-View Editor, pressing your hotkey will toggle between the Non-Destructive Bevel Pie Menu and the Show Manipulator Tool.
Cage Display #
The Cage Display settings allows you to change the behaviour of the cage visibility on the objects that have a Non-Destructive Bevel attached.
You can choose between three modes, Default, Context Shading and Component Mode that are detailed below.
Default #
When Default is selected, the cage display will never be altered, it will always be displayed according to the other settings such as xRay and shading.
Context Shading #
When Context Shading is selected, the display settings on objects with Non-Destructive Bevel attached will be managed automatically.
If you turned On the xRay or turned Off the Shading, whenever the previewBevel object is not visible in the viewport, the xRay will be turned back Off and the shading turned back On.
For example, if you isolate an object that has the xRay mode enabled, it will be disabled temporarily while the bevelPreview object is not visible.
Component Mode #
When Component Mode is selected, the cage visibility will be turned off and it will become visible only when the object is set to component mode so that you can still edit the object’s components as usual.
Real Time #
Enabling the Real Time setting will compute every changes you make on your object to the beveled object in real time.
When disabled, the changes will only be propagated whenever your Maya is idle.
Weighted Normals #
Allows you to turn On / Off the Weighted Normals on the Non-Destructive Bevel. Weighted normals only works on soft edges, so the Smoothing Angle of the bevel must be set accordingly or you will not see any effect.
Enable Bevel Display #
Allows you to turn On / Off the Non-Destructive Bevel visibility.
If you’re working on an heavy object, you could leave the Bevel Display disabled and only enable it occasionally to have a preview of the final result.
Enable xRay #
Allows you to enable / disable an xRay mode on objects with Non-Destructive Bevel attached so you can see the bevelPreview object underneath.
Enable Shading #
Allows you to enable / disable the Shading on objects with Non-Destructive Bevel attached so you can see the bevelPreview object underneath.
Wireframe Color #
Allows you to change the wireframe color of the bevelPreview objects.
Wireframe Opacity #
Allows you to change the wireframe opacity of the bevelPreview objects.
Bevel Offset #
Allows you to changes the Non-Destructive Bevel offset conveniently, without having to access it from the polyBevel settings.
